WoodItGood is supported by its readers. We may earn an affiliate commission at no extra cost to you if you buy through a link on this page.
If you’ve been tinkerin’ around in your shop for a while, you might be thinkin’ it’s high time to pick up a smoothing plane.
Now, if you’ve never used one before, don’t worry… buyin’ your first smoothing plane ain’t as tricky as it might seem.
With a little know-how, you’ll be smoothing boards down so nice you could slide a glass of sweet tea right across ‘em!
Let’s walk through what you should be lookin’ for when you’re shoppin’ around for this essential woodworking tool.
Our Favorites
Blade Quality: Sharp is Smooth, My Friend
First things first, let’s talk about the blade (or the iron, as some folks call it).
A smoothing plane is all about getting that glassy-smooth finish on your wood, so you’ll want a high-quality blade that sharpens up nice and holds that edge for a good long while.
Look for blades made from A2 or O1 steel.
A2 is tough and will stay sharp longer, while O1 is easier to sharpen but might need more frequent touch-ups.
Either way, a sharp blade is the key to a great smoothing plane. Dull blades will leave you cussin’ out tear-out and rough spots faster than you can say “pass the sandpaper.”
Sole of the Plane: Flat as a Pancake
The sole is the flat bottom part of the plane that rides along your wood.
For a smoothing plane, you need that sole to be dead flat… and I mean flat as a pancake!
If the sole’s got any wobble or curve to it, you’ll end up with uneven surfaces, and that just defeats the whole purpose.
Some planes come factory-flat, but if yours doesn’t, you might need to do a little tuning yourself.
Don’t worry though! Once you’ve got it nice and flat, you’ll be glidin’ across boards smoother than butter on a biscuit.
If ya’ want to know about more than just smoothing planes, I can teach you about all the different ones a beginner might need to know about here.
Weight and Size: Get the Right Feel
#3
Smoothing planes come in different sizes, usually No. 3 to No. 4 being the most common.
The size you choose mostly depends on what feels right in your hand and the type of projects you’re workin’ on.
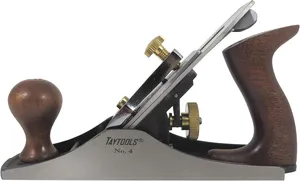
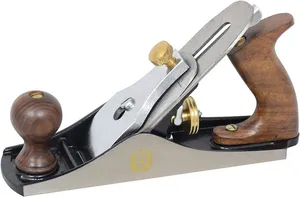
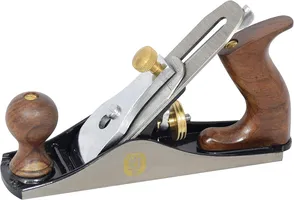
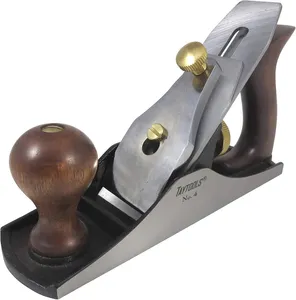
A No. 4 smoothing plane is a good all-around option for beginners, it’s the standard size most folks use and works great for flattening boards.
Weight is another thing to consider.
A heavier plane can give you more momentum, making it easier to power through tough wood.
But don’t go too heavy if you’re just gettin’ started. You want to have control, not feel like you’re wrestlin’ a bear.
Adjustable Mouth: Tighter is Better
Like a block plane, a smoothing plane should have an adjustable mouth.
The mouth is where the blade peeks out, and a tighter mouth is better for fine work.
When you’re smoothin’ down your final pass on a project, you want to make sure that mouth is nice and snug to avoid tear-out, especially when you’re workin’ with tricky grain.
A wider mouth can be useful when you’re takin’ thicker shavings, but for the fine, final smoothing work, you’ll want to close it up tighter than a drum.
The Frog: Adjust for Comfort

The frog is the part of the plane that holds the blade in place, and in a good smoothing plane, you’ll want a frog that’s adjustable.
In case you don’t know what a frog IS, lemme explain.
The frog on a plane might sound a bit funny, but it’s actually a real important part of the tool. The frog is that angled piece of metal where the blade (or iron) sits, right behind the opening in the sole (the bottom of the plane).
It holds the blade steady and lets you adjust how much of it peeks out to make your cut.
Why’s that important?
Well, it lets you adjust the blade’s position, so you can set it just right for the job at hand.
Movin’ the frog forward gives you finer cuts, while pullin’ it back allows for thicker shavings.
A good adjustable frog will give you the versatility to handle different types of wood and projects with ease.
Comfort and Grip: It’s Gotta Feel Right
You’re gonna be using this tool for a good bit of time, so make sure it feels comfortable in your hand.
Check the grip on the handles (or totes) and make sure they’re smooth and fit your hand well.
If it doesn’t feel right, you’ll be fightin’ it the whole time, and that’ll just lead to frustration.
Smoothing planes are often made from cast iron or wood. Cast iron is more common and heavier, which can be good for momentum.
But if you like a lighter touch, you might want to try a wooden plane.
Pick it up, give it a few strokes, and see how it feels. If it feels like it was made for your hand, that’s the one you want!
So, if you’re in the market for your first smoothing plane, just keep these things in mind: you need a sharp, high-quality blade, a flat sole, the right weight and size, an adjustable mouth, and a comfortable grip.
Get yourself a plane that feels good in your hand and is built to last, and you’ll be smoothin’ wood down like a pro in no time.
Well, shoot, I reckon that’s all the plane talk for today.
If you’ve got any more questions about smoothing planes, just holler, and I’ll get back to you quicker than a squirrel up a hickory tree. Happy shoppin’, and happy smoothin’!


